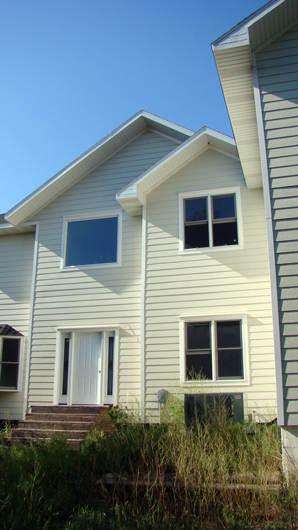
Showing posts with label Ranch House. Show all posts

Hard-Grass Flooring


Flooring. The word that stumped us for months.

The ranch house had many many square feet of sub-floor to cover, and we had many many options. But there are two problems with lots of options; first, not being able to decide what we wanted. Second, making a decision (based on those many lovely, luxurious options) and then unsuccessfully attempting to cram the cost into a budget that's just not quite big enough.

And by "cram the cost into a budget that's just not quite big enough" I mean this; we knew we wanted solid hardwood floors. We knew we wanted something dark. This lead us to one conclusion; Brazilian Ebony. Ha! In our dreams. At $8 per square foot, that wasn't happening.

And so, we sort of, somewhat indecisively, settled for Walnut- only to realize that we couldn't afford it unless we downgraded to a thinner, engineered plank. The thin planks aren't as sturdy, so we were worried about quality. We don't ever plan on replacing our flooring, so this was a one time shot- in other words, we knew we'd better get it right the first time.

Brazilian Walnut


And to be totally honest, we weren't all that crazy about the green tones in Walnut. (Weird, right? Walnut has a lot of green in it. You can't see it in the photo above, but it's obvious when you see the large sample in the store.) But it was the darkest colored flooring that we could (maybe) afford. So, finally, after months of debating, we finally made a decision; we'd let God take care of it.

Okay, I know, that's not (technically) a decision. But non-the-less, we committed it to Him in faith, and He never disappoints. Even in trivial little matters like the flooring for our house. It must give Him joy to tend to the needs of his kids, regardless of how small or inconsequential they may be. Or maybe it was just to give us a chance to brag on how great He is to us. Either way, praise the Lord!

Here's how it went down; One night, a couple of months after giving the problem to Him, I woke up in the middle of the night and couldn't get back to sleep. This never happens. But there I was, wide awake. So I moseyed on over to the computer and checked Lumber Liquidators. Well, by golly, there just happened to be a terrific deal on carbonized bamboo flooring. By terrific, I mean too-good-to-be-true compared to every other option and price we'd seen. And better yet, it was in a color we knew we liked, because we'd seen the same kind in a friend's house. Not only did we know we liked the look of it (which was always uncertain with other options, since we only had small samples to go by), but get this- it was solid! Not exactly solid hardwood, since bamboo is, in fact, grass. (Yet, interestingly not green, like walnut.) But the point is that these were wide, thick planks, not the thin, small planks of the cheap versions of walnut flooring that we were about to settle for before this little big discovery in the middle of the night.

Carbonized (Horizontal) Bamboo

And even though this variety is more of a mid-toned color, there are a lot of beautiful variations in it (excuse the dust);


And it's a nice contrast to our very dark espresso kitchen cabinetry and stair trim;


So, in the end, we think it works better than having really dark flooring. Balance and contrast is good!

So, waking up in the middle of the night and stumbling upon this great deal was a huge blessing. We placed an order that same day, before the sale ended or stock ran out, and voila; floor problem solved.

Praise Jesus. Has He done anything surprising like this for you guys lately?

- - - - - - - - - - - - - - - - -

P.S. Lumber Liquidators is a great company to purchase floors from! We definitely recommend them if you're in the market for flooring. See the exact bamboo we ordered here (not necessarily on sale though).

P.S.S. Did I mention that bamboo is eco-friendly, just like another one of my favorite things? (Hint; first word- "cloth". Second word- "diapers".)

- - - - - - - - - - - - - - - - -

Like it? Share it!

A Seat for our Sitting Room


Enough is enough. We'd been staring at our unfinished bay window turned construction-tool-and-trash-zone for four years worth of ranch visits, and this time it had to go. Along with the rest of the junk on the floor nearby.


As well as the blue painting tape on the center and left window panes that for whatever reason didn't come down when the tape from the right pane did. Somebody (probably me) must have decided that it was a good stopping point. And let's not forget the rodent-motel twin box spring that's been migrating from room to room for as long as we can remember.

To think that one day (God willing) there will be couches in here! It's current condition wouldn't clue you in, but this is our sitting room.

And we couldn't stand the construction zone look any longer, so this spot got some much needed cleaning.


Shew! That's better. (Minus the cardboard box and the tip of the long horn- try as I might, I couldn't manage to get a single photo free of some sort of misplaced item or construction evidence.) But it is still a construction zone, so I'll just have to be patient.


Notice the object leaning against the bay window seat? That's what it is- the actual seat that has yet to be installed. We have no idea how to do it, which is one of the reasons it's still sitting there. But a simple how-to google search ought to suffice when the time comes, and in preparation I've been gathering some ideas for how to make the most of this space.

Here are some of my favorites so far;


I love the idea of having built-in storage. And the fact that the front of the seat is painted white makes it look like it's all one custom piece. I'm pretty sure we could give this "treatment" to ours as well by painting the same space white (that's currently green, since it's "the wall") and then giving it some white decorative trim to make it look like it's one planned piece.


This one's really fun. We can't exactly have this circular shape, but I love the idea of a custom cushion and decorative pillows to make it cozy and inviting. The way this was made into its own little reading area complete with a coffee table puts a few ideas into my head as well. Hmmm...I'm sensing another (shoddy) sewing project in my sort-of-near future...


One other option is to cover the top of the "seat" with some of our leftover bamboo flooring and then trim it with either the same espresso-stained maple trim that we have on our stairs (which you can see in the photo below), or just finishing it off with some variety of bamboo trim.

Oh look, the traveling box spring has moved yet again!


How about you? Do you happen to have a bay window that doubles as a seating area? Or have you done anything else creative with a similar window space?

- - - - - - - - - - - - - - - - -

P.S. Speaking of seats, here's a portion of one of my favorite Psalms;

Blessed is the man who walks not in the counsel of the ungodly, nor stands in the path of sinners, nor sits in the seat of the scornful; But his delight is in the law of the LORD, and in His law he meditates day and night. {Psalm 1:1-2}

- - - - - - - - - - - - - - - - -

Like it? Share it!

We Have Cabinets!

Our very first peak!
Cue the choir- the kitchen cabinets are up!- and after four and half years of planning, it's like music to our ears. Praise God for His perfect timing and provision, as well as enabling us to get this massive cabinet hanging project behind us!

But first let me set the stage.


We arrived at the ranch after 22 hours of driving to discover a much anticipated garage full of newly ordered cabinets. It was like Christmas morning. With glee in our eyes, we ripped open boxes like kids ripping open gifts. And just like Christmas morning, this lead to inevitable chaos;


As great as it was to stare that them amidst a sea of cardboard and scattered haphazardly on the floor, we couldn't wait to get them hung. And on the verge of chickening out and hiring a pro to do it for us, I gave Thane a hearty "you can do it!" (Easy for me to say, since I wouldn't be doing it, LOL.) But a little encouragement goes a long way, and the iron-man-cabinet-monkey (that he's now proved himself to be) did it! Along with the much appreciated assistance of somebody else we'll call cabinet monkey #2.

This was our inspiration (see the full gallery here);


And we decided on maple cabinets with an espresso stain from MidContinent Cabinetry. This look is what we based our stair design on, as well.

Now for the DIY portion of the post;

Tool List
-Hammer
-Pencil
-Measuring tape
-Electric drill
-Heavy duty general purpose screws size 9x2-3/4"
-Laser leveler
-Regular leveler
-Stud finder
-Electric rotary saw (for cutting the cabinet trim)

The laser leveler and the stud finder was extremely helpful. The last thing we wanted was crooked, ready-to-fall death traps. If we couldn't guarantee how good this whole undertaking would look when we got through with it, we at least had to make them sturdy. Here's the leveler;


And I've got to say that I'd have no idea what kind of screws to use for a project like this, but thanks to people who know a lot more than me, here they are- heavy duty general purpose screws;


Since I'm in no way a cabinet hanging expert, I can't really give you an accurate or detailed step-by-step guide. Thane could, but he has this thing called a job. So I'll just pass along a few helpful tips that we picked up throughout the process, just in case any of you are considering hanging new kitchen (or even bathroom or office) cabinetry. If nothing else, this goes to show that you don't have to be an expert to tackle this kind of project! All you need is the right tools and a little gumption. All Thane did to prep was watch a quick You Tube video (see a variety here) and enlist a little help from cabinet-monkey #2 (another able bodied man).

So here we go;

Before starting, use your cabinet blueprints to get everything laid out and prepped. Then there's no need to stress over whether you're hanging the right pieces in the right spots once you kick it off.


Tip 1- Start in the corner, if you can.

See the corner piece? We started there in order to get the right placement of the cabinetry. It would have been a nightmare to start on the outside of either wall and then realize that the corner piece didn't fit. So we avoided that possibility altogether and didn't run into any problems! This top corner piece is a "garage" with a little door that pulls down to cover whatever you store inside. It was a little tricky since the space between the garage and lazy susan underneath of it had to be the perfect width in order to accommodate our future counter tops. (How that will play out is anyone's guess...)


Tip 2- Use a 1x2 as a guide for hanging.

See the 1x2 board that's nailed under the rightmost cabinet? Thane used it as a guide for hanging the upper cabinets to be even and level. Determine how high your cabinets need to be hung on the wall (depending on if they're standard or not), and then mark that height. He marked the correct height using a regular leveler (to make sure his board was level), and then it was as easy as "stacking" each cabinet along the top of the 1x2 board and screwing it into the wall. By the way- whoa those walls are orange! Especially in this photo, haha. I'm thinking I might tweak this color a shade or two once we've picked our counter tops.


Tip 3: Studs=sturdy! Use a stud finder to mark your studs.

Screwing into studs vs. drywall is kind of a must in this case, so it was really helpful to mark out the studs so that Thane knew where to drill. There is a lip on the top back of the cabinet and one underneath as well.  Drilling into those lips will prevent anyone from seeing the screws when you're putting away dishes or just opening them up and showing them off.
 

Yep, they're sturdy!

Tip 4: Screw your cabinet faces together

If you screw the sides of each cabinet together it will remove any seams or gaps and make the kitchen look completely tied in.


You might remember the 3D plans our supplier drew up for us after measuring the dimensions of our space. Take a look at how one 3D compares to the real thing! (Minus counter tops and appliances...)


Unfortunately the lighting in this room isn't great. We don't have electrical lighting installed yet, and this room gets the least amount of natural sunlight. But oh well, you get the idea.


This might be my favorite section of the new kitchen;


I love the bookshelf with the cottage-y panel details. This was a total surprise to me, I assumed the backing to the shelf would be plain. Then to the right of it is a microwave shelf, which will be great for preserving counter space. Directly below the book shelves is what will be a desk for my laptop. I'm always finding myself dragging my laptop into our current kitchen to reference a recipe. But that will no longer be necessary once it gets a permanent home here! Not to mention the fact that it'll be great for playing music and sermons while I'm cooking and cleaning.


The empty hole with the wire hanging down is where the ovens will go. Word to the wise- as great as double ovens are, they're pricey. This is one thing we could have planned to do without when planning out the cabinetry. It's kind of a standard in the custom cabinet world, and it's just about all you see when you browse kitchen galleries while building your own kitchen plans. I think it'll be worthwhile in the long run, but it's a big pill to swallow right at first!

So, that's a big check on the ever long ranch house to-do list. And all glory be to Christ for providing us with the time, finances, and wonderful babysitter that enabled to get this done! This home will surely be a blessing to our family, but I'm praying that it will bless a lot of other people too. Hopefully it'll be a place for lots of wonderful family time, Christian fellowship, and service in the years to come. As imperfect as we are, we want to dedicate all we do to Jesus for the sake of His name and Kingdom. That's our desire and prayer!

Like it? Share it!
 

And...We're Back!

  
Whew! After 44 hours of driving and a week of non-stop ranch house work, we're home. And just in case you noticed the lack of posts, well, an unfortunate collision between my water glass and Asher's foot sent the laptop to its untimely death. So, for a grand total of six days I was not only text free (no cell service on the ranch), but computer free as well. Yes, you heard me. No e-mail, no Facebook, no blogging, no texting, no nothing for a week. And I actually quite enjoyed it- total seclusion has it's perks! How often do you get the chance to escape to the middle of nowhere where the only mode of communication is a land line? And lets face it, nobody knows how to use those things anymore.


But now we're home where we have a working computer...and it's just sitting here...asking to be used. So here I am, excited to get started sharing all our ranch house progress.


Unfortunately, there was no progress made to our landscaping situation. As you can tell, our sandy jungle of a front yard is in need of some major work. But that will have to wait till we're living there.

But as for the flooring, kitchen cabinet installation, painting, and a handful of other things, we made leaps and bounds! Praise Jesus for that. With only short amounts of time to work (basically, a couple of weeks per year) we do our best to make each trip count. And with His provision and a ton of help from Grammy, we accomplished much more than planned! We are truly thankful. So stay tuned for pics of progress and plans, they're coming soon!

- - - - - - - - - - - - - - - - -

P.S. Asher turned six months old during our trip! See his 26 week picture here (6 month and 27 weeks also coming soon!)

P.S.S. Another major answer to prayer was making it through the 44 hours of total driving without a meltdown from Asher. And praise God, he didn't get upset at all on the way. It was a little rougher on the way home, but he still did wonderful overall.

- - - - - - - - - - - - - - - - -

Like it? Share it!
 

Out with the (M)old, In with the New


Raise your hand if you've ever had a moldy shower liner. Okay, okay, not all at once!

I'm assuming that we've all run into this problem at one time or another. Thane and I definitely have. As a matter of fact, we run into it at least once every six months. So, at least once every six months I'm standing in Walmart staring at shower liners and debating between the $2 plastic one that's destined for the trash and the $15 washable one that will last "forever".

Well, the $2 variety has been the winning choice for far too long. I finally got the gumption to upgrade. And for $12, this one should pay for itself in, oh, 6 years. I know, it doesn't sound all that worthwhile when you look at it like that. But at least it'll be one less household item that gets routinely thrown away, and assuming it washes well (only time will tell) it'll be worth the cash in the long run.

It's 100% polyester, which is non-absorbent and won't "hold" water; hence the "water repellent" promise on the packaging. I'd love to wow you with more fascinating facts on textiles (courtesy of my Textiles for Fashion college course), but I'll assume I'm the only one that finds that stuff interesting and just leave it at that. Although it's obvious that the $2 plastic liners are technically "water repellant" too. If only they could go into the washer! Maybe it's worth mentioning that I've unsuccessfully tried de-molding one with 409 and a scrub brush.


So, I'm betting on this polyester curtain. As a matter of fact, since she's a new and hopefully permanent member of the household, we'll call her Polly. She'll no doubt have many adventures to share as time "tells" how she works.

And just for fun, here are a couple of photos of our very rough and yet to be finished master bath at the ranch house;


The shower stall is directly across from the tub, you can see it peaking out a tad on the right side of the photo. And here's our little toilet closet in drastic need of cleaning and door-ing. As is the entire bathroom.


While I'm thinking about it, here's a quick to-do list that we hope to put a good dent in over the next couple of weeks (that's right, we're going!);

Ranch House Master Bath To-Do List

-Install sink tops
-Install sink faucets
-Hang mirrors over each sink
-Install towel rods and rings
-Finish tiling the shower
-Install shower door
-Stain leftover maple trim (from the stairing project) to line the tub
-Install toilet closet door, linen closet door, and main bathroom door
-Deep clean

So watch for updates over the next few weeks. After months of ranch house stagnancy, progress is about to happen! Praise God for the opportunity to make the trip out, as well as the financial stability to continue working towards a finished home! As always, we hope and pray that it will be used for His glory and Kingdom, that Jesus would be honored in all we do.
- - - - - - - - - - - - - - - - -
P.S. Back to reusable household items- see reusable swiffer wipes here, reusable diapers here, and reusable grocery bags here.
- - - - - - - - - - - - - - - - -

Like it? Share it!
 
Related Posts Plugin for WordPress, Blogger...